Showing Maps on Page

You must have a google Maps API Key for Maps to work.

To get an API Key, Visit: https://developers.google.com/maps/documentation/javascript/get-api-key. API will be required to have a Google account in order to create the key but the process is simpler than pie. No programming experience or coding required. Just copy the number and paste it into the plugin field.

Without a key it will be very hard to remove Google Maps errors that will warn you against using the non-registered API. You may have up to ten addresses or location pins on a single map without a registered key. The demo for OnList isusing a non-registered API and only is showing the first ten listings on the front page map.

Once you have a key, simply paste it into the OnList admin Options setting tab where you see the text field for Google Maps API Key.

gmaps key


For an API Visit: https://developers.google.com/maps/documentation/javascript/get-api-key.

Insert Images into a Listing

Adding text to your listing should be self explanatory, it is a lot like Word or Write where you find the tool at the top of the editor and select the option to change color size and alignment.

Images are a bit more complex and when you get used to how it works you can do a lot of things with images.

Your main image will be added using the “Featured Image” upload box in the lower right corner of the editor page. All you need to do is click on the “Set featured image” link in the box.


img insert

Once you select your picture—via uploading new, or using current images in the Media Saved toolkit—then it will be saved, once you click “Publish” ( or “Update” ). You may always use this image again for additional posts since it will be saved to your Media Library.

To add more images to your listing you should consider the page layout and where you want to add them. You may add them inline—sort of like this instruction page is doing—or you can add the images to the bottom of your listing in a more standardized, common gallery fashion.

Step 1.

Open “Add Media


add media

Step 2. Upload or select images and place as Gallery or simply place one at a time.


gallery

Address Presentation

By ticking the button to display address field as a single field will stretch the Address row to take up one row across… normally the Address would be shown as:

Address

City

State

Postal Code


address presentation

Initiating single field will spread it out on one line but you may have two lines if the address is longer.

Musee du Louvre, 75001 Paris, France


address showing

You may also choose to not show labels of Address, City, State etc. in the multiple/stacked rows method but, a single row method will not have any labels except the Address label (which can also be turn off—as shown in the example above).


Display Listing Fields

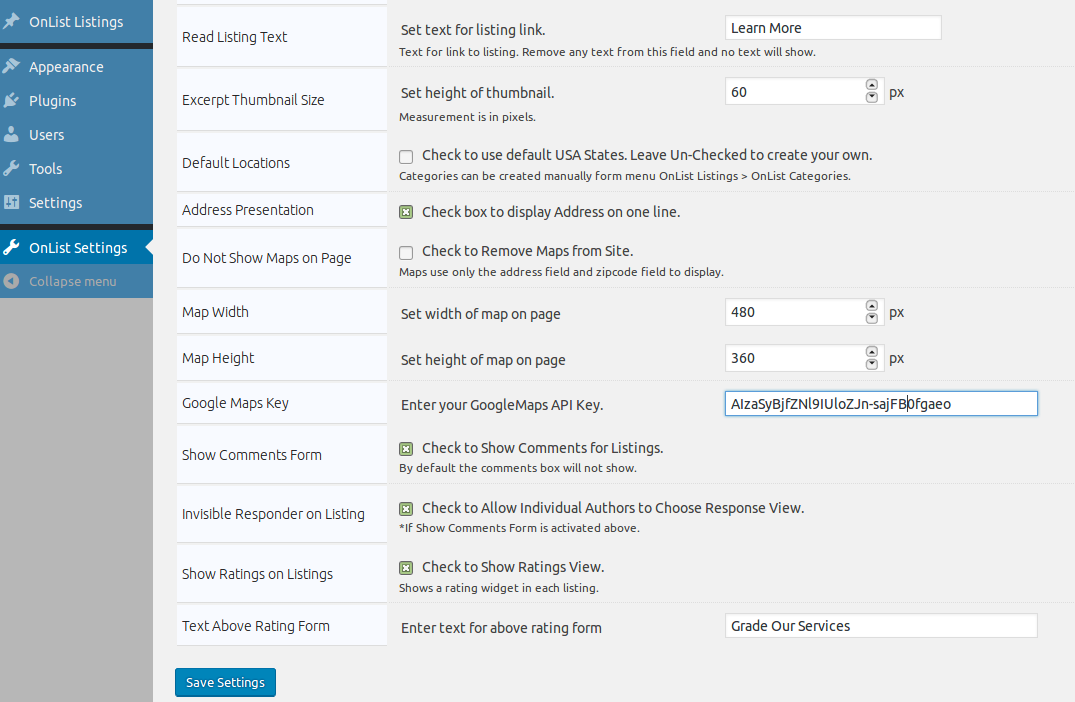
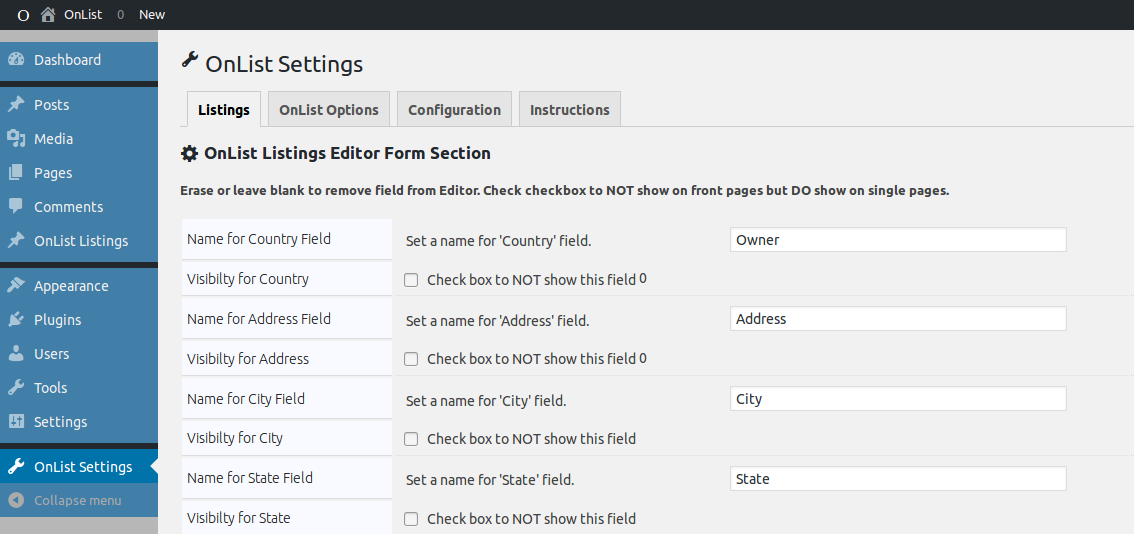
All field names can be changed to fit the purpose of your website. Fields are by default named

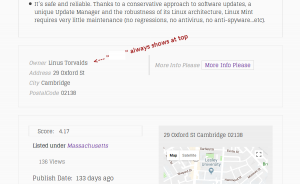
Country, (changeable – Shows in a preferred location on listing page.)

Address, (changeable)*

State, (changeable)

City, (changeable)

ZipCode, (name changeable, but must use Postal or Zip if you want to use Maps*)

Phone, (flexible – Must use phone style entry. Security filters set to phone numbers only.)

Email, (must be an email address but not required to fill out on form)

Website (not required and changeable) and last but not least,

Other. (changeable – Shows in a preferred location on listing page.)

Country field


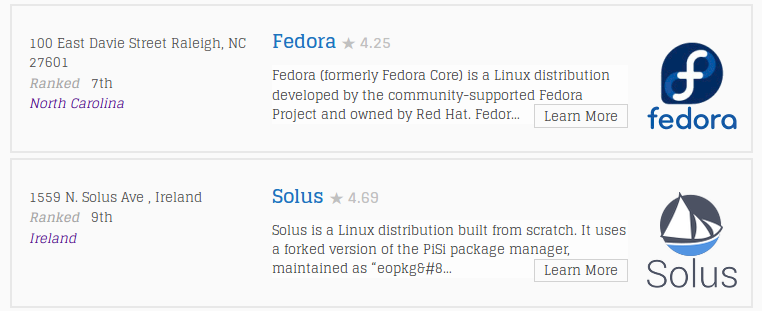
*Map included for each listing uses the Address and Postal/ZipCode fields to calculate the location.


If you change a changeable field to what name you want it to be, the default name/label will be replaced by your new field name. This new field name will show on the listing for each individual single listing pages.


You can select to NOT show a field on the Main Listings Page** to save space in the listing excerpt being displayed.

If checking box, below each field input, field will NOT show on the front-end, Main Listing Page, but, still be available to show on the Single listing page. (Does NOT show on Home but DOES Show on the Single Listing Page.)
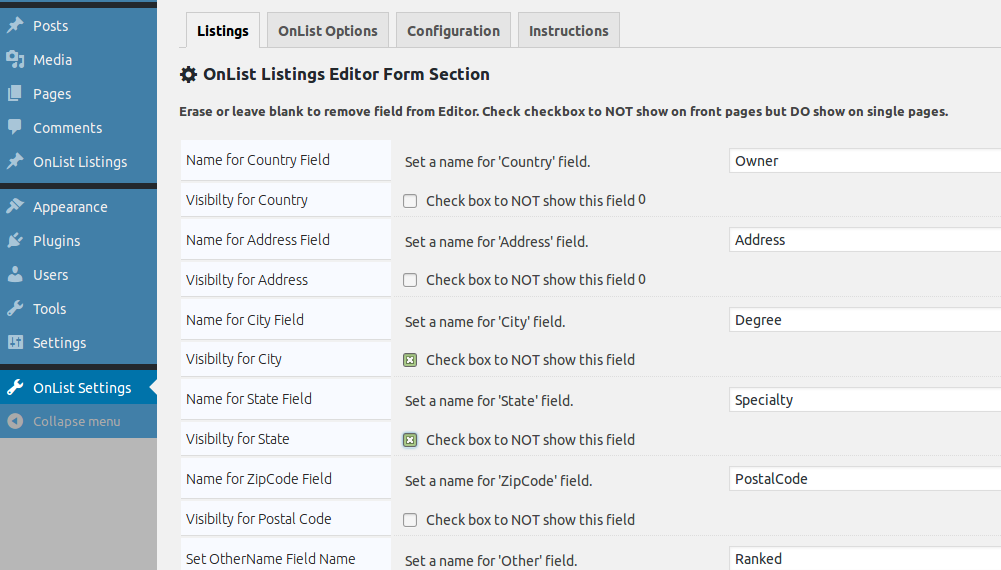
not show label


Set Field Name

Leaving a field BLANK will remove it from listing altogether.

If field is left blank then that field will NOT show in the Add Listing dashboard Editor and users will not be able to use that field in the listings at all.

example:


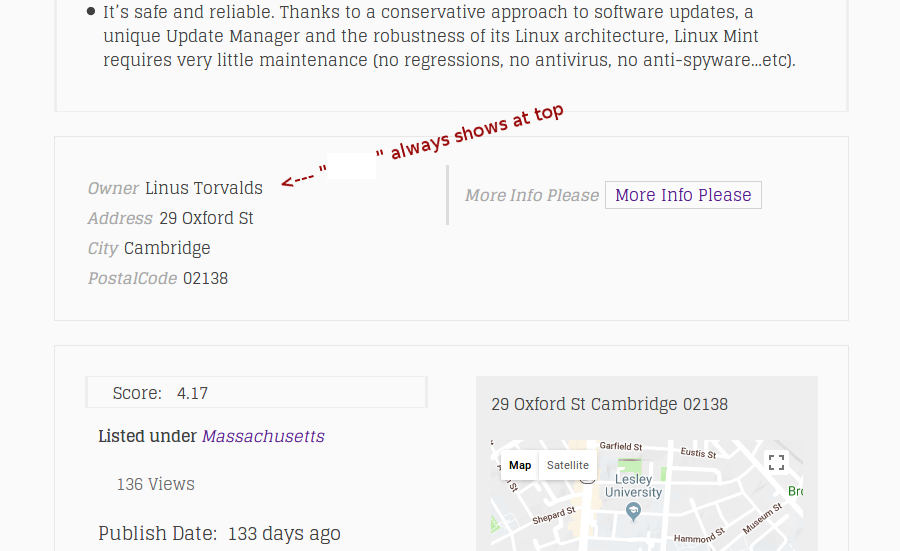
“Owner” label now shows, in the first form field; since the wording “Owner” was added as the new label in admin setup to replace OnList settings field default value of “Country.” (You can replace this field with any name.)

with labels


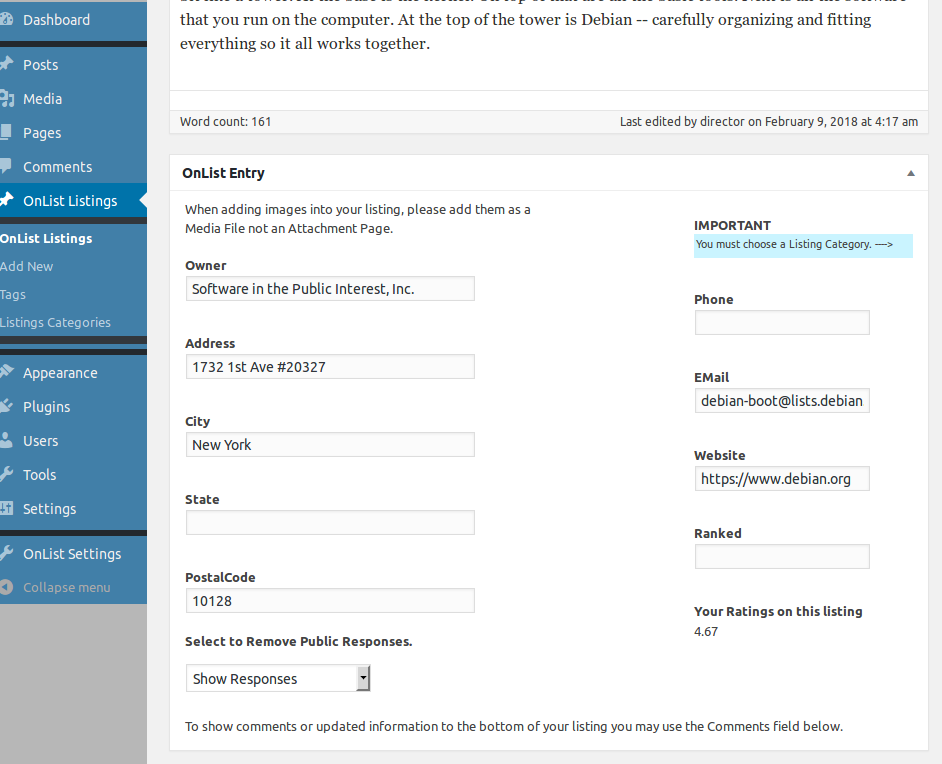
“Owner” label and field is now removed by leaving field blank in admin OnList Listings tab.

label gone


**Page that has the shortcode [onlist-listings] (The main directory page).

Setup OnList

== Installation ==
This section describes how to install the plugin and get it working.

1. Upload `onlist.zip` to the `/wp-content/plugins/` directory, or use the Add Plugins button.

install plugin


upload plugin


2. Activate the plugin through the ‘Plugins’ menu in WordPress


activate plugin


3. Go to OnList Settings and configure OnList settings. (Head back to Instructions page for detailed list of items you can configure that are in the Admin panel settings page.)

settings menu

4. Add shortcode to a page to display listsings …………………………………………..[onlist-listings]
5. Optional, add shortcode to a page or use widget to display categories …..[onlist-categories]
6. Optional, add shortcode to a page to display login form ………………………..[onlist-loginform]

Create your Menu with the links to the above shortcoded pages so people can find the listing pages etc. You may want to make the Main Listing Page as your home page.

menus


7. Suggested to set Permalinks to `post name.` This shows your listings by name and will attract SEO Search Engines.

settings permalinks


9. Have Fun.