Set # of listings on home page
This setting can override the WP blog posts setting for setting how many posts show on the blog page. Blog Posts are controlled by WP Admin and OnList Listings per Page are controlled from OnList settings. See image.
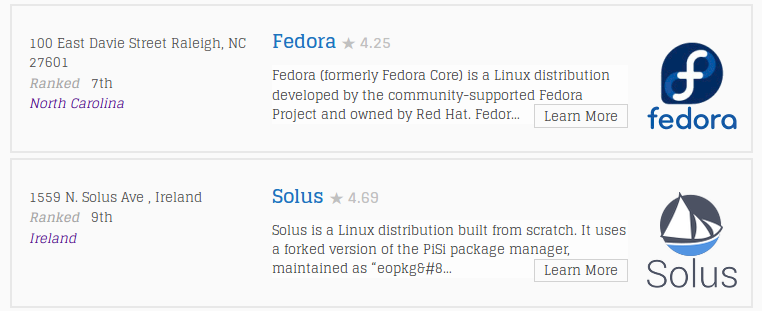
This setting will control how many listings you see on the Main Listing Page and all additional Listings will show as paginated with pagination navigation built into the bottom of every page.

Set # characters in excerpt
This setting can help disperse the listing words inside of an Excerpt for the Main Listing Page boxes. Number selector uses “characters” per excerpt and not words. This helps to make more finite paragraph sizes so you can control the amount of content that is displayed on the page.
Set the height of excerpt box
This setting is a height adjustment for the boxes which hold the Excerpt content. You may or may not have to do anything with this setting for most themes. If you theme is behaving funny and you are having trouble with mobile or tablet views, then try using this setting to adjust the height accordingly.
Set text for listing link
The listing link is what shows at the end of content inside of the Excerpt boxes and links to the actual Article (or single post as WP calls it). By default this is just a greater-than sign to appear like a “forward” arrow. You can replace this with text or even three dots (ellipsis).
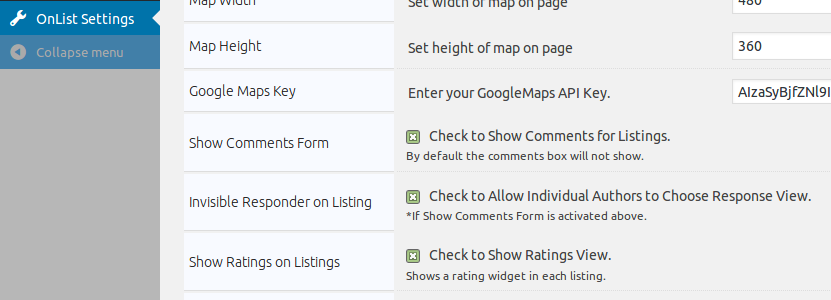
Check to Show Comments for Listings
OnList plugin uses the built-in WordPress Comments API to display a form area on each listing at the bottom of the listing page. WP Comment API is very robust and can serve as a tool to implement several use case scenarios that will help your customers, visitors and listing owners create a way to communicate.
Comment form can be used to ask questions between site visitor and listing owner.
- Use for responding to a job listing
- For bidding
- Setting up a service call for services
- Share URLs
- Share names of ‘interested’ customer/members
- Writing review about listing
- Just plain commenting about listing
Checking box to Show Comments for Listings will allow comments to be shown and used globally on your website.
Un-checking Removes comment completely from listings. (existing comments will still be saved in database)
Remember that these comments are separate from WP Posts Comments and do not show in any Blog page posts.
Check to Allow Individual Authors to Choose Response View
If Check to Show Comments is Checked, checking this setting will create a dropdown selector in the listing Editor for Listings; allowing the individual Authors/Owners of listings to have control over whether or not the comment form area is display on their individual listing, or not.
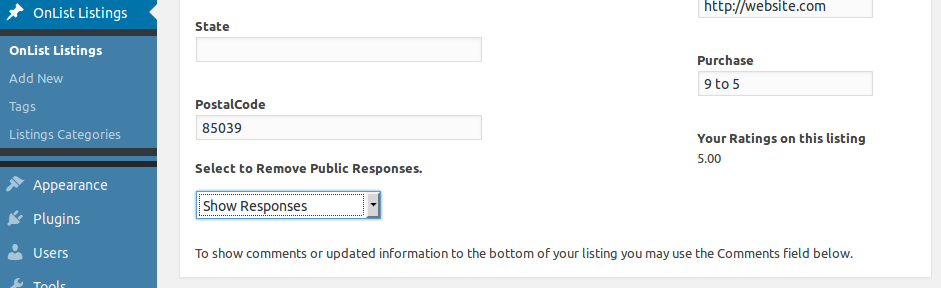
Every listing an Author has can now have the choice of showing comments or not showing comments. A listing author may turn on the comments/review/advert for one listing they own on your website but may turn off the comment for another separate listing they have on the site.
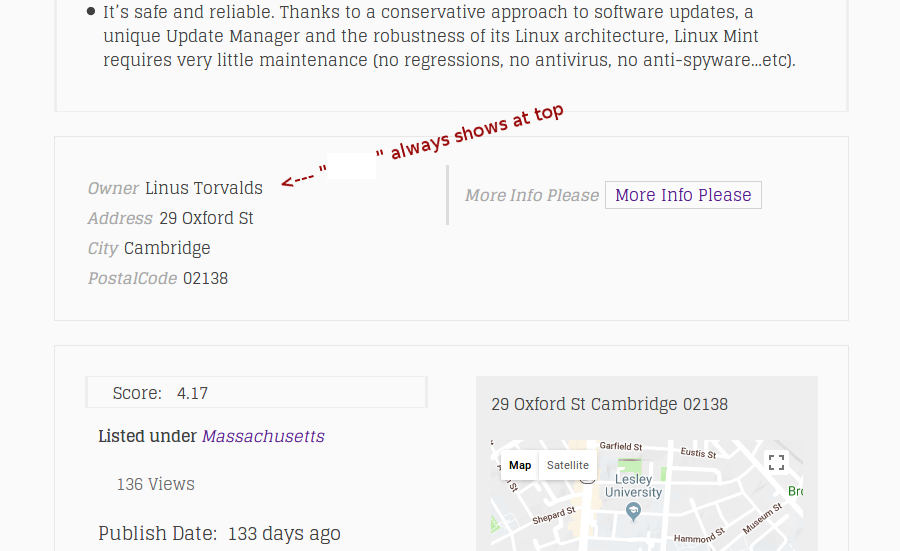
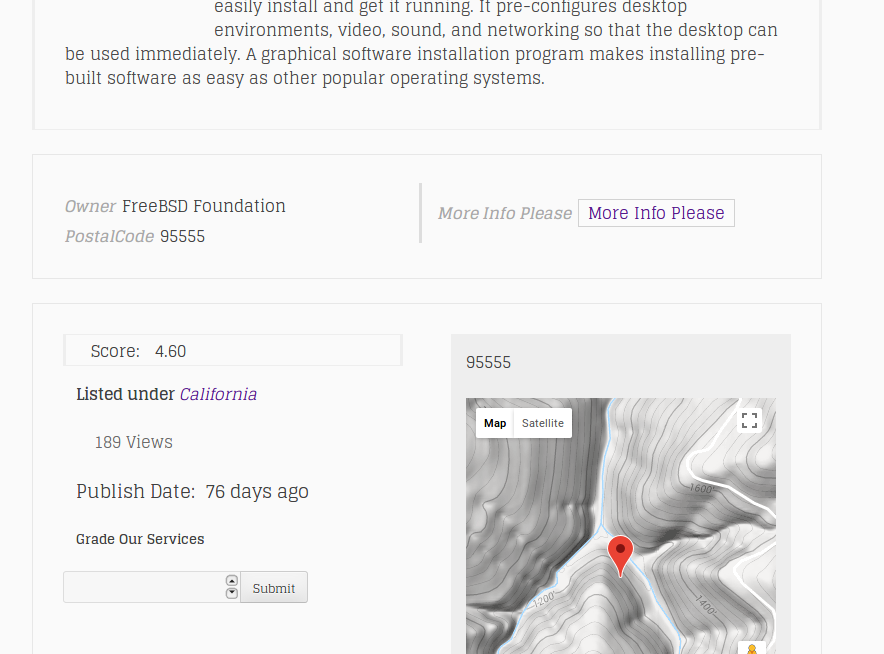
Check to Show Ratings View
Check box to allow Ratings system on every listing. Un-check to remove.
Enter text for above rating form
Text will show above the OnList Rating form if you add text into this field from the admin settings Options tab. Leaving the field blank will show no wording on the public view of your Single Listings.
This text is handy for many uses.
- Grade services
- Rate a song or painting
- Voting system
Please note that OnList Rating system runs distinct from most systems and is a bit more concise in the results it returns. Ratings are based on a simple One to Five choice range and have half digits for each number… 1, 1.5, 2, 2.5… 4.5, 5. The total can become be more precise than a five Star system. Results are displayed using two digitals after the decimal place. So a rating may show as 4.67 as apposed to 4.5. We just felt it was a nice outside-the-box type of system to use.