Setup OnList

== Installation ==
This section describes how to install the plugin and get it working.

1. Upload `onlist.zip` to the `/wp-content/plugins/` directory, or use the Add Plugins button.

install plugin


upload plugin


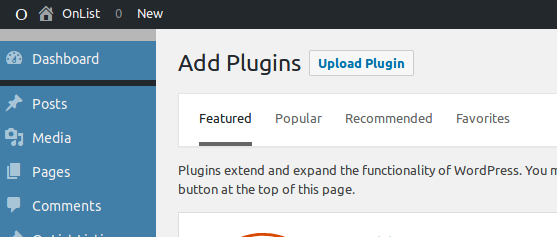
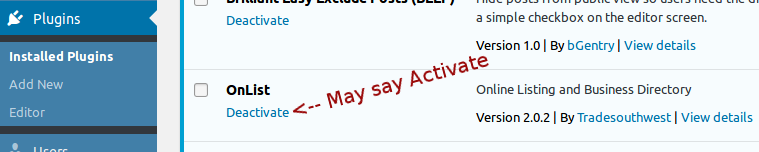
2. Activate the plugin through the ‘Plugins’ menu in WordPress


activate plugin


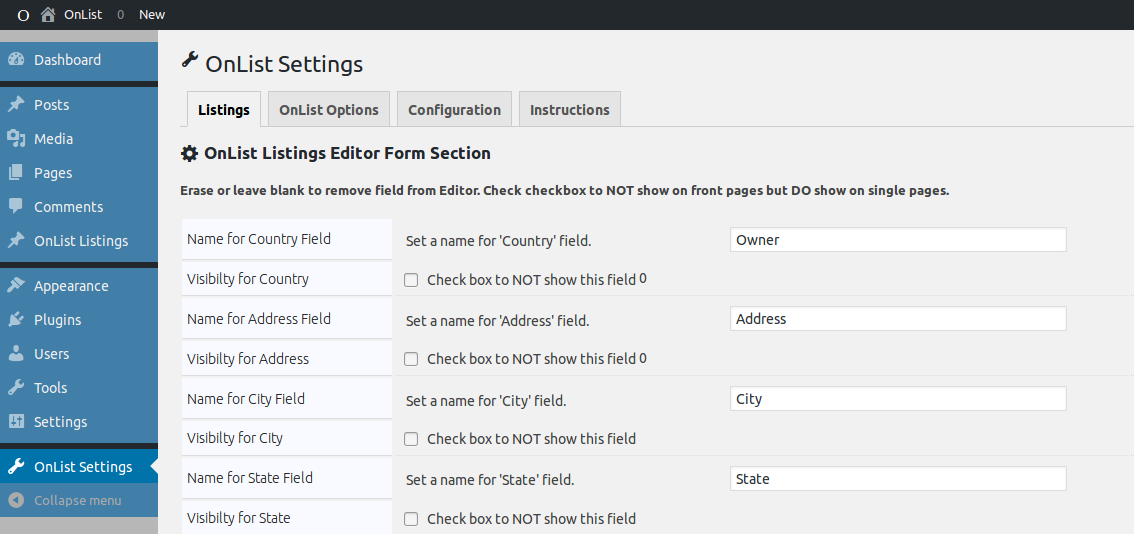
3. Go to OnList Settings and configure OnList settings. (Head back to Instructions page for detailed list of items you can configure that are in the Admin panel settings page.)

settings menu

4. Add shortcode to a page to display listsings …………………………………………..[onlist-listings]
5. Optional, add shortcode to a page or use widget to display categories …..[onlist-categories]
6. Optional, add shortcode to a page to display login form ………………………..[onlist-loginform]

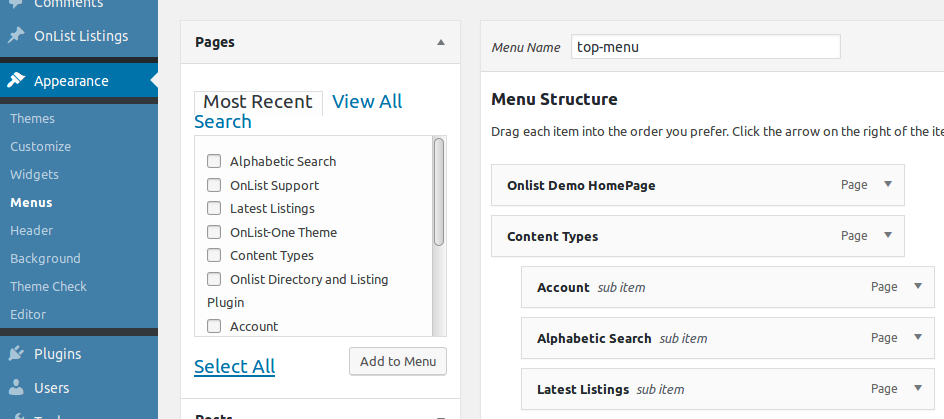
Create your Menu with the links to the above shortcoded pages so people can find the listing pages etc. You may want to make the Main Listing Page as your home page.

menus


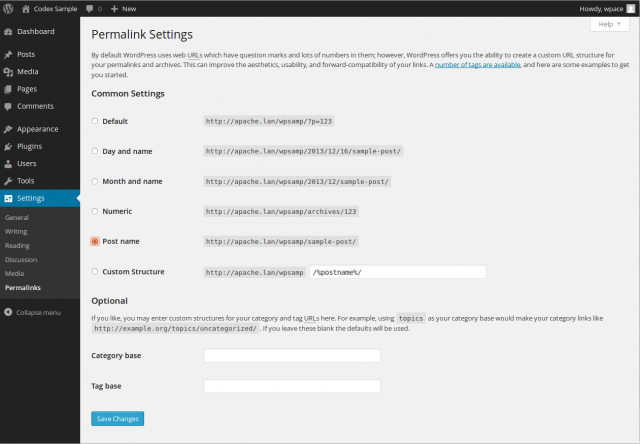
7. Suggested to set Permalinks to `post name.` This shows your listings by name and will attract SEO Search Engines.

settings permalinks


9. Have Fun.

User Levels

User Roles are a way for WordPress to keep track of who can do what on your website. OnList Directory and Listing script uses the built-in WordPress role attributes. So if you are familiar with WP then this should be easy to do. If not then here you go:

From the Admin page go to Settings > General

instruct

Be sure to add Anyone Can Register – or no one will be able to register.

By default, WP uses Subscriber as the Default Role. You will want to set OnList User Roles to Author. This will allow any new registered person to add a Listing.

To prevent spam registration, use the User Role of Subscriber or Contributor. You will have to manually approve each new User but will have more control this way.

You may choose to shut off Anyone Can Register and install a Membership plugin.

If you only have a single user or team using the OnList plugin you may choose to turn off membership altogether.

linux

OnList Plugin Instructions

General Overview. For more Info click on Topic.

Setup
This section describes how to install the plugin and get it working.
1. Add shortcode to a page to display listingsĀ  ………………………………………[onlist-listings]
2. Optional, add shortcode to a page or use widget to display categories [onlist-categories]
3. Optional, add shortcode to a page to display login form …………………….[onlist-loginform]
4. Go through all options in OnList Settings to activate what you want to use.
5. Suggested to set Permalinks to `post name.`
Listings Shortcodes
Main Listing Page onlist-listings
A Categories Page onlist-categories
A Log In Page onlist-loginform
There is also a Widget for Category Lists. Appearance > Widgets > Onlist Category Sidebar.
User Levels

Upon install of OnList, change user roles to ‘Author’!*

* If site is not open to ‘anyone can post,’ then do not change user levels.
Displaying Fields (or not)
Provides the option to display fields in many formats on several pages, or not.
Address Presentation
Provides the option to display address on one line.
Images For Listings
All image placement uses the WP native Media Library. One nice advantage of Media Library is that you can insert an image ANYPLACE within your post/listing and can make galleries. Suggestion would be to put your images at the bottom of the content.
Show Maps on Page
Toggles whether or not Maps show on pages
Google Maps Key
For an API Visit: https://developers.google.com/maps/documentation/javascript/get-api-key.
link opens in new window
Before Content
Copy or write HTML into the textarea that will either match your theme or that you want to use to display before the listing. Before and After Content are only effective on the Single Template (single listings).
After Content
Both before and after textareas can be as simple as a clearfix element or you might use a section of your current theme to offset or create areas around the OnList section.
Comments on Public View
By default, ALL responses will show on public views*. Check OnList Options, Check to Allow Individual Authors to Choose Response View, to allow the authors to choose whether or not they want to receive comments for their listing. *If Show Comments Form is activated.
All Other OnList Settings
Set # of listings on home page.
Set # characters in excerpt
Set the height of excerpt box
Set text for listing link.
Listing Editor
Listing Tips and Tricks

For custom configuration of OnList please email Larry @ support@tradesouthwest.com