You must have a google Maps API Key for Maps to work.
To get an API Key, Visit: https://developers.google.com/maps/documentation/javascript/get-api-key. API will be required to have a Google account in order to create the key but the process is simpler than pie. No programming experience or coding required. Just copy the number and paste it into the plugin field.
Without a key it will be very hard to remove Google Maps errors that will warn you against using the non-registered API. You may have up to ten addresses or location pins on a single map without a registered key. The demo for OnList isusing a non-registered API and only is showing the first ten listings on the front page map.
Once you have a key, simply paste it into the OnList admin Options setting tab where you see the text field for Google Maps API Key.
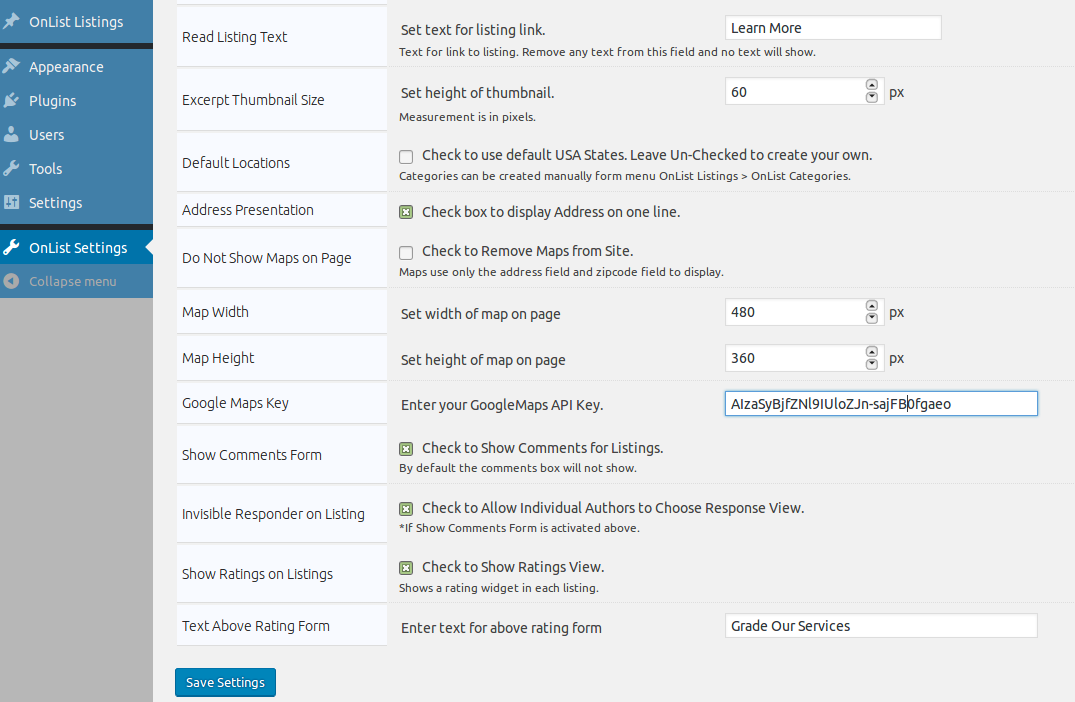
For an API Visit: https://developers.google.com/maps/documentation/javascript/get-api-key.